
Getting deep into the backcountry is exhilarating—until the signal drops, the trail fades, and your GPS becomes useless. If you’re searching for reliable guidance on forest navigation without gps, you’re likely preparing for a trip where self-reliance isn’t optional—it’s essential. This article is built to give you practical, field-tested navigation strategies that work when technology doesn’t.
We’ll break down how to read terrain features, use natural indicators like the sun and tree growth patterns, interpret topographic maps, and move confidently using compass bearings. You’ll also learn how to avoid common navigation mistakes that can turn a short hike into a survival situation.
Our insights are grounded in real-world wilderness experience, extensive field research, and hands-on gear testing in diverse forest environments. Whether you’re a seasoned trekker or building foundational outdoor skills, this guide will help you travel smarter, safer, and with greater confidence under the canopy.
Why Your GPS is a Liability, Not a Lifeline
As you learn to rely on traditional navigation techniques in dense forest terrain, don’t forget that when it comes to tackling stubborn vegetation along your path, understanding the right tools, like those featured in our article on Lescohid Herbicide Bunnymuffins Ultimate Stubborn, can make all the difference.
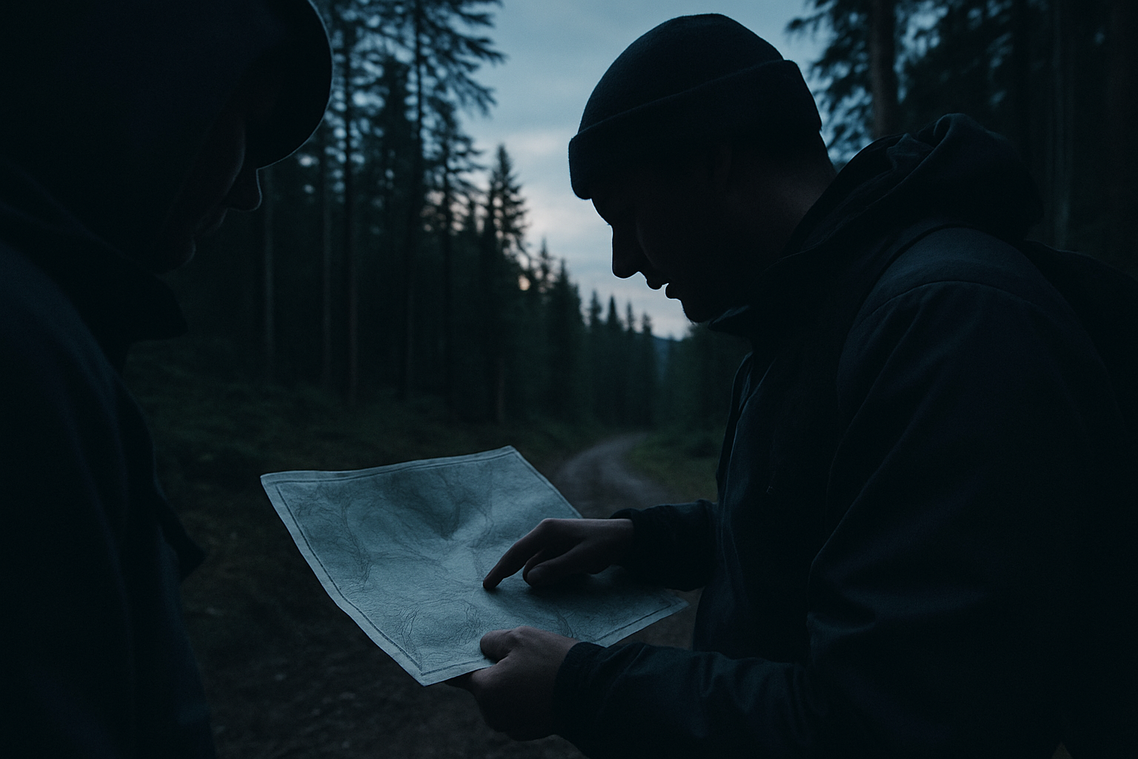
SMARTPHONE GPS vs MAP AND COMPASS. One depends on SIGNAL and BATTERY; the other depends on YOU. In timber, a blue dot can vanish the moment clouds roll in or your phone dies (and you’re in a low-budget survival reboot). Critics argue GPS is accurate and convenient—and they’re right. But convenience breeds dependency.
Manual navigation builds redundancy. With forest navigation without gps, you read terrain, track bearings, and note landmarks. Search and rescue teams train this way because PAPER doesn’t crash. Pro tip: always carry a baseplate compass and waterproof map.
The Foundation: Mastering Your Map and Compass
Decoding the Topographic Map
First, let’s define the core tool. A topographic map is a flat, scaled drawing that represents three-dimensional terrain using contour lines—thin lines that connect points of equal elevation. When those lines bunch tightly together, the slope is steep; when they spread out, the land relaxes into something more forgiving (your calves will notice the difference).
However, many hikers argue that digital maps make this skill obsolete. After all, your phone shows elevation instantly. That’s true—until the battery dies or the signal fades. Unlike an app, a paper map reveals terrain patterns at a glance, helping you visualize ridgelines, saddles (low points between peaks), and drainages before you ever lace up your boots.
Equally important is map scale, which tells you how distance on paper translates to real ground—say, 1:24,000, meaning one unit equals 24,000 of the same units in reality. The legend, meanwhile, decodes symbols for trails, streams, and structures.
Actionable tip: Practice identifying hills and valleys in a local park before attempting forest navigation without gps.
Understanding Your Baseplate Compass
Next, the compass—specifically a baseplate compass, prized for simplicity and reliability. Its magnetic needle points to magnetic north, while the rotating bezel sets a bearing (your intended direction). The direction-of-travel arrow and clear baseplate align with your map.
Critics say compasses are outdated in the smartwatch era. Yet declination—the angular difference between true north and magnetic north—still matters. Ignore it, and you could drift hundreds of feet off course over a mile (yes, really; NOAA confirms declination varies by region). Master this adjustment, and you gain precision most weekend adventurers never develop.
Pro tip: Write your local declination inside your map cover for quick reference.
Field Techniques: From Pinpointing Position to Plotting a Course
Mastering a map and compass can feel old-school in the age of satellites. Still, when batteries die or signals vanish, these skills quietly become heroic. I won’t pretend every navigator agrees on the “one right way” to do this—minor variations exist—but the core principles remain remarkably consistent.
Step 1: Orienting Your Map
The First Principle: To orient a map means aligning it with the terrain so north on paper matches north in reality. Without this step, everything else wobbles (and not in a charming way).
How-To: First, lay your compass flat on the map. Rotate the map and compass together until the magnetic needle sits neatly inside the orienting arrow—often called “boxing the needle.” This aligns magnetic north with map north. Then, confirm by matching visible features—ridges, lakes, trail bends—to what you see around you.
Admittedly, magnetic declination (the angle between true north and magnetic north) complicates things. In some regions it’s negligible; in others, it’s not. If you’re unsure, check a current topographic map or government survey data (USGS provides updated declination info). A few degrees off might not matter over 100 yards—but over miles, it absolutely does.
Step 2: Taking and Following a Bearing
The Goal: A bearing is a precise directional measurement in degrees from north. Think of it as your compass’s version of a GPS pin.
To take a bearing from the map, place the compass edge between your current position and your destination—say, a distant peak. Rotate the housing until orienting lines match the map’s north-south grid. Read the degree mark at the index line.
Then, in the field, hold the compass level and turn your body until the needle is boxed again. Sight a landmark—tree, boulder, ridge—along that line and walk to it. Repeat. It’s surprisingly effective for forest navigation without gps, though thick brush and uneven terrain may force detours. When that happens, recheck your bearing rather than trusting instinct (instinct gets dramatic under stress).
Step 3: Finding Your Location with Triangulation
The Problem it Solves: If you’re unsure where you are, triangulation offers clarity.
Identify two or three distinct landmarks. Take a bearing to each. Convert those to back bearings (add or subtract 180 degrees), then draw lines on your oriented map. Where they intersect is your position.
Some argue triangulation is too slow in urgent situations. That can be true. Yet in uncertain terrain—especially during complex trips like those discussed in desert expedition planning risks and preparation strategies—precision often outweighs speed.
Even seasoned navigators admit: conditions change, visibility drops, and mistakes happen. The compass doesn’t guarantee perfection. But it gives you something better—reliable direction when certainty is in short supply.
Using the Sun and Stars
First, let’s demystify solar navigation. The shadow-stick method is simple: place a straight stick upright in the ground, mark the tip of its shadow with a rock, wait 15–20 minutes, then mark the new shadow tip. Draw a line between the two rocks—that’s your east–west line. (Low-tech, yes. Effective? Also yes.) Many guides stop there. However, few explain that accuracy improves near midday when the sun’s arc is shortest—pro tip: shorter wait times reduce drift.
At night, locate the Big Dipper. Follow the two “pointer stars” at the edge of its bowl upward to find Polaris, the North Star. Polaris sits almost directly above true north in the Northern Hemisphere (NASA confirms its near-fixed position). Unlike movie myths, it’s not the brightest star—think steady compass, not Hollywood spotlight.
Interpreting Terrain and Vegetation
Next, use natural “handrails”—linear features like streams or ridgelines—to maintain direction. In forest navigation without gps, water is critical: it flows downhill due to gravity, often leading toward valleys and settlements (U.S. Geological Survey data supports watershed patterns).
As for moss always growing on the north side? Not reliably. Instead, observe slope exposure: sun-facing slopes host denser, drier growth; shaded slopes retain moisture and thicker understory. Competitors rarely stress comparing multiple indicators—yet cross-checking terrain, water flow, and vegetation gives you confirmation, not guesswork.
Your Path to Navigational Confidence
You now have the fundamentals. Map. Compass. Terrain awareness. But here’s the real question: will you trust them when your phone screen goes dark?
That spike of panic when technology fails is real. Have you ever felt it—that sudden “what now?” moment? The antidote is skill. Practicing forest navigation without gps transforms uncertainty into CONTROL.
Some argue modern devices make manual methods obsolete. Why memorize bearings when satellites exist? Fair point. But batteries die. Signals drop. Skills endure.
Start small:
- Buy a local park map
- Take simple bearings to visible landmarks
- Track your return route
Confidence isn’t downloaded. It’s earned, step by step.
Mastering the Wild with Confidence
You set out to learn what it really takes to navigate and survive in untamed terrain—and now you have the essential tools to do it. From reading natural landmarks to sharpening your backcountry instincts, you’re better prepared to handle the uncertainty that makes the wilderness intimidating in the first place.
Getting lost, second-guessing your direction, or relying entirely on technology are risks you no longer have to accept. By practicing forest navigation without gps and strengthening your core survival skills, you take control instead of leaving your safety to chance.
The next step is simple: put these techniques into practice and upgrade your gear with field-tested recommendations trusted by thousands of outdoor enthusiasts. Don’t wait until you’re disoriented on the trail. Explore our top-rated guides and resources today and build the confidence to navigate any terrain safely and skillfully.